Showing posts with label Before / After. Show all posts

Friday, March 8, 2013

We Painted Our Floors WHITE! Yeah... we are cray cray...

When we had to renovate our living/dining room we of course ran out of money and decided to just paint the subfloor. Click HERE to see the before!

Here's a shot from 2011 to see the floor color - I was trying to go for a deep charcoal color but apparently I was color blind that day in selecting a color because I wound up with a deep navy!


The navy floor color never bothered me but The Hubs and I always wondered how it would be with white floors... and that day came after our annoying bath reno. The contractors trampled through the living room for weeks with their nasty shoes, etc. and there was no saving the floor.

So what the heck.... let's paint the floor a HIGH GLOSS WHITE shall we?! We scrubbed the floors clean, vacuumed the floors about 40 times and then started the process. It took 3 coats and we used an oil based white. The key here is to use oil. It took about 5 days total but was worth the wait! Here's what it looked like drying:


And here's a sneak of it with the furniture in. I have to take some more pictures of the rest of the room but wanted to share this:


 Don't these floors get insanely dirty you may ask?! Well, yes, they do get dirty. But since they are shiny, glossy oil based all I have to do is take a wet rag and wipe them down. And I kinda like to see just how dirty my floors are. Then I know I need to clean them! 

So, for the time being we love these white floors! That's the fun thing with just having a subfloor - we can do anything we want to it and it doesn't matter because it's not permanent. When the back of the house undergoes its massive reno the whole back will have wide plank heart pine floors but that day will come.... never... ;) 


Wednesday, September 19, 2012

Before & Afters of a Great Room in a Client's House!

Don't ya just love before & afters!? And don't ya just love "Great Rooms"?! One day, I'd like a Great Room... one day.. one. day. ;)

Anyhoot - the below pics are from a clients house that I'm helping out with at work. The house is gorgeous and it's been a lot of fun because we are basically starting from scratch. So no existing furniture had to really work in the space. 

Here's some before:


 Those three french doors open out to a pool. It's STUNNING!


Aaaand here are the afters! These are with my crappy camera and are too dark so squint your eyes to see it's loveliness! 

Our client loves to throw parties so we were going for a sexy/loungy feel for this space. The sofa is SO dramatic and its so fun to have a cocktail sitting in this guy! Not that I have... ;-)


We pulled a couple of things from other rooms - the Mitchel Gold cream leather chair, Oly round table & the Harouni painting. Everything else we brought in.

It was a very HGTV/Bravo type day for sure! I broke a fancy vase (oops!) and the clients dog escaped the house, so I was frantically running down the street after him! (Could you imagine if your decorators got your dog killed!?) But we did this whole room in about 4 hours. Installs are super fast, it's just the waiting for furniture/accessories that are on back order, arrive broken, etc. that are the killer.


We decided on this vintage lucite table so your eye isn't distracted by a bulky table base when you have the gorgeous view of the backyard.


I just love the way this room came out. My boss and I have very similar taste - which is why I work for him of course! It's very true to the Shaun Smith Home aesthetic - classic, with a masculine feel and a modern take on traditional. 

I can't wait to share with y'all the next rooms we're working on! Hope ya liked this one.


post signature

Wednesday, June 27, 2012

MORE Bedroom Talk!! A Look at Our BLACK Guest Bedroom!...

Remember this room?! Aaaahhh!! Memories! How GROSS is this!? This was the second kitchen the previous owners had - yes, they had 2 kitchens - their fancy kitchen and their fryin' kitchen! haaha only in New Orleans would one need two kitchens...


Little nasty kitchen then became a little dining room... but we never really ate in here so we moved the dining room into the living room...


And then in a fit of crazy I painted the whole room, floors included - BLACK! It's so cozy! 

These are just some snapshots of its current state - don't judge me on the wrinkled bedding ;)

My huge pineapple painting is covering up a little doorway into the laundry room!

I still haven't decided on the ceiling color and I need to change out the overhead lighting... thank goodness those eyesores didn't make the photos! I feel like this room is very girly/glamy right now... I'm diggin' it! 


I decided to paint this little guest room all black because it has SO many eyesores that I wanted them all to disappear - the black is helping!

What do you think?! Would you paint a bedroom completely black? When I lived in NYC I had a black bedroom and loved it. 


Thursday, May 24, 2012

Our Bricked Courtyard Reveal!!


I'm excited to finally be typing that this here is the reveal of our bricked courtyard on the side of our house! AND a little reveal of some landscaping at the front of the house! (Is it called landscaping if it's potted plants?!) 

Here's my friend Chris pulling up a nice bit of brick on the sidewalk... we pulled up the bricks, weeded, leveled the ground and then re-laid the bricks. BIG project! The Hubs has been working a lot so I've been enlisting additional help for these annoying projects that Hubby likes to put off ;) 


And here's how the bricks look after we laid down some dry mortar/sand mixture and hosed it down. I love me some mortar/sand mixture!!! It fixes all those big gaps that were impossible to fix with this 100+ year old herringbone pattern!

I think we may have to do another run of it to get all the tiny cracks. I HATE weeds coming through!


Here's what the courtyard looked like in progress...


And here are some afters:


Below is a close up of a tricky part of the project - lining up the existing bricks from the sidewalk to our new bricks. Thank God for anal, perfectionist neighbors who like to help you brick! (Thanks Craig!)


Here's how the front of the house is shaping up:


We hated our little chain link fence, so a cheap and so much better looking idea was to buy some bamboo reed fencing and zip tie it to the existing fence!! I love the way it came out. We don't have the budget to build the fence we really want so even if this lasts just 2 years it's well worth it! 

We plan on running it all along the side of the house too. It adds a nice tropical/Caribbean vibe which definitely fits in our subtropic New Orleans! I'll feel like I'm on vacation sitting in the courtyard sippin' a pina colada! 


Best part is 80% of this big project was FREE!! My mom gave me the chairs and pots, the garden stool I had and just sprayed a navy blue and the bricks were from my mom as well. THANKS MOMMA! :)


Our cute little topiaries! I have to do the same for the other front door... maybe this weekend. I wanted to make sure I could keep these guys alive before investing in four.

Side note: if you're looking for simple, modern and large planters Lowe's has some nice options. The two above are a pretty slate grey and huge and like $30 each! 

So what do ya think!? Our little Creole Cottage is finally getting a little pretty! 

Now if only I had the time/money/energy to work on the other side!

Bleghhhh....


Wednesday, December 14, 2011

Yet Again Another Rearrangement of the Furniture!...

I'm always rearranging my furniture... it usually happens when I'm doing a deep cleaning of the house and get annoyed with this or that so I start moving around everything. Well... here's a shot of the latest state of one of the walls in our living room....


I'm playing with the whole "gallery wall" here and put the TV on an angle. MUCH better like this - it was centered on the wall on a too big console but now it's perfect and I can fit another chair in! (notice I painted the chair GOLD! It's a wee bit too shiny for me so I'll have to find a more muted gold to lightly spray over it...)

It works for now! Here's what the wall was like 6 months ago...


Yes, The Hubs thinks I'm nuts but he's used to it by now! And tonight we're swapping the dining room with the guest bedroom... Our house has too many options I just can't stop myself!! ;)


Thursday, October 20, 2011

My Hide is in!!....

My cowhide just came in and I LOVE it!! Yay for Overstock! It's super soft - it almost feels like silk. I am very pleased with my purchase!

Here's a quick before shot of the living room with my mom's zebra hide:


And here's a shot of it today with the neutral hide:


Please excuse to super lumpy sofa - that's a whole other issue! But I do love how light and airy the room feels with all the white and camel colors throughout.


 I could go for a larger sisal - like an 8 x 10 but this one I already own so it will do for now!


Monday, August 15, 2011

Before/After... New Kitchen Floors!

A couple of weekends ago I had enough! Enough of our laminate "wood" floors in our kitchen that were slowly buckling up and creaking every time someone entered the kitchen.


 I'm not sure what had gotten into me, but I pulled up the main offending board and was shocked at how easy it popped up! Without even a plan of what to lay down I realized I could easily pull up the entire kitchen floor and thankfully the flooring underneath was laminate and all in tact. (whew! after dealing with the termites in the adjoining room!)

Sooo off to Lowe's we went to investigate some cheap (had to be cheap!) new flooring to lay down. We were looking at the laminate cheesy peel and stick stuff and tile options but all were blegh... thankfully that section is next to the garage/utility section which is where we discovered our unconventional new floors!

There came the discovery of this 20.5" x 20.5" Light Gray Raised Coin Garage Vinyl Tile!! It was a little more expensive at $6.50 per tile - but these tiles are larger at 20.5"x20.5". PLUS we can reuse them when we redo the kitchen! You just lay them down and that's it! No glue or anything!

So back home we went to tackle this fun project!


I was shocked to see how easy these floors popped up. It was actually fun and a little theraputic!

Here I am pulling the floors up - I am super excited to say 95% of this project was completely done by ME! I am woman - hear me ROAR!


Almost there...


After:


We are SO happy with the way it came out and the flooring is so comfortable and not to mention durable! We are slowly morphing the kitchen to a more industrial style and these are great for the new look! This whole project took about 4 hours from start to finish and cost just under $300!

 What do you think?? It's definitely not conventional but it certainly is functional!

- BOO 

Tuesday, August 9, 2011

Dining Room Reveal! Before/After...

Whew... this room has come a long way! It's still not completely done (is it ever!?) but I wanted to share with y'all the latest state of the dining room!  

Remember this!?

Before:


Getting there... but still not quite! 


After:


We have a dining room now! Yippeeee!! I love the way it is coming together and I especially love the curve in my Pantone chairs that mimics the curve in the table.... It's all in the details!


And I made my first Roman shade with this room re-do! I was surprised at how easy it was. Remember my love of the pagoda? Well, I found a gorgeous Asian toile with pagodas in the clearance section at Calico Corners! I paid a total of $17 for the material and hardware for this shade! Not too bad...


The room definitely has an Asian influence - from the pagoda fabric, Chippendale chair, Foo Dogs, Asian stools, and an Asian style mirror (not pictured)... but I wanted to modernize it with the soft greys, whites and pops of pink.

A shot of the art on the wall - I moved my little ugly Mexican man painting in and made this creepy/definitely a conversation piece baby doll head art thingy... I actually really like it though!! The baby head came from some art piece my husband made years ago and I just layered hot pink paper to the canvas and stuck him on top. I like weird.

Close up of the latest weirdo art piece.


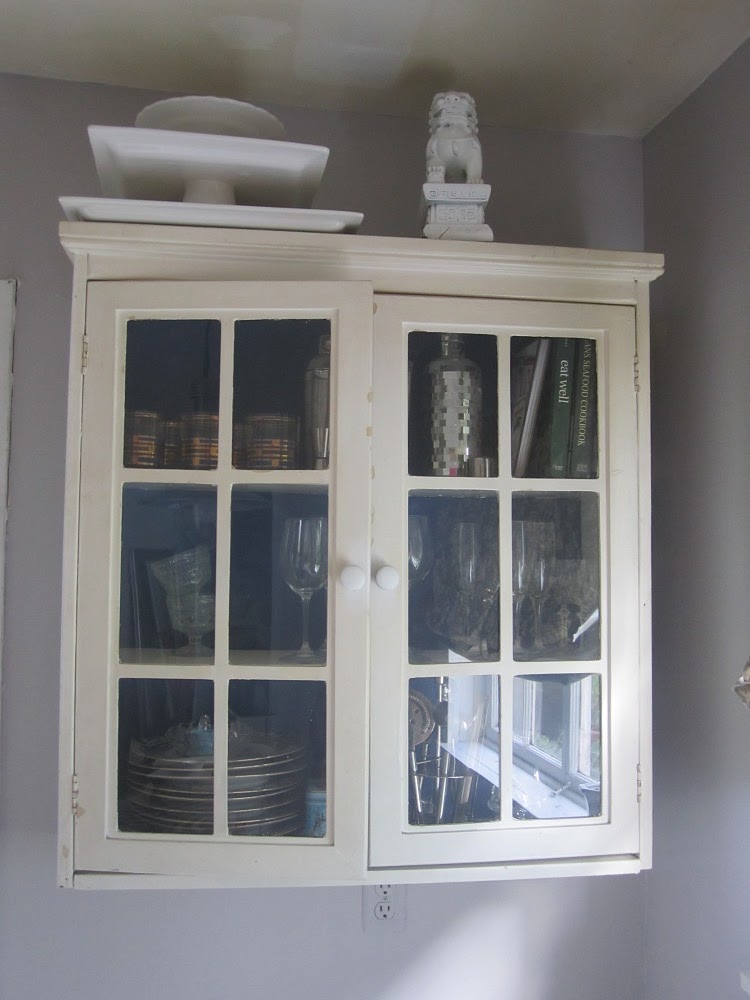
Cabinet we wound up keeping in. I'm glad I did because it stores our bar ware and our fancy stuff... yeah - we got fancy stuff!!


And what oh what does the other side of the room look like?! Here ya go! Don't judge...In the coming weeks this side of the room will become an office/art studio.

Right now it's a hot mess.

The main things left to do in this room is paint the ceiling (ugh) and touch up the paint on the floors.
Let's end the post on the pretty after though shall we?! 


- BOO